Chef Julian Moreau
INTRODUCTION
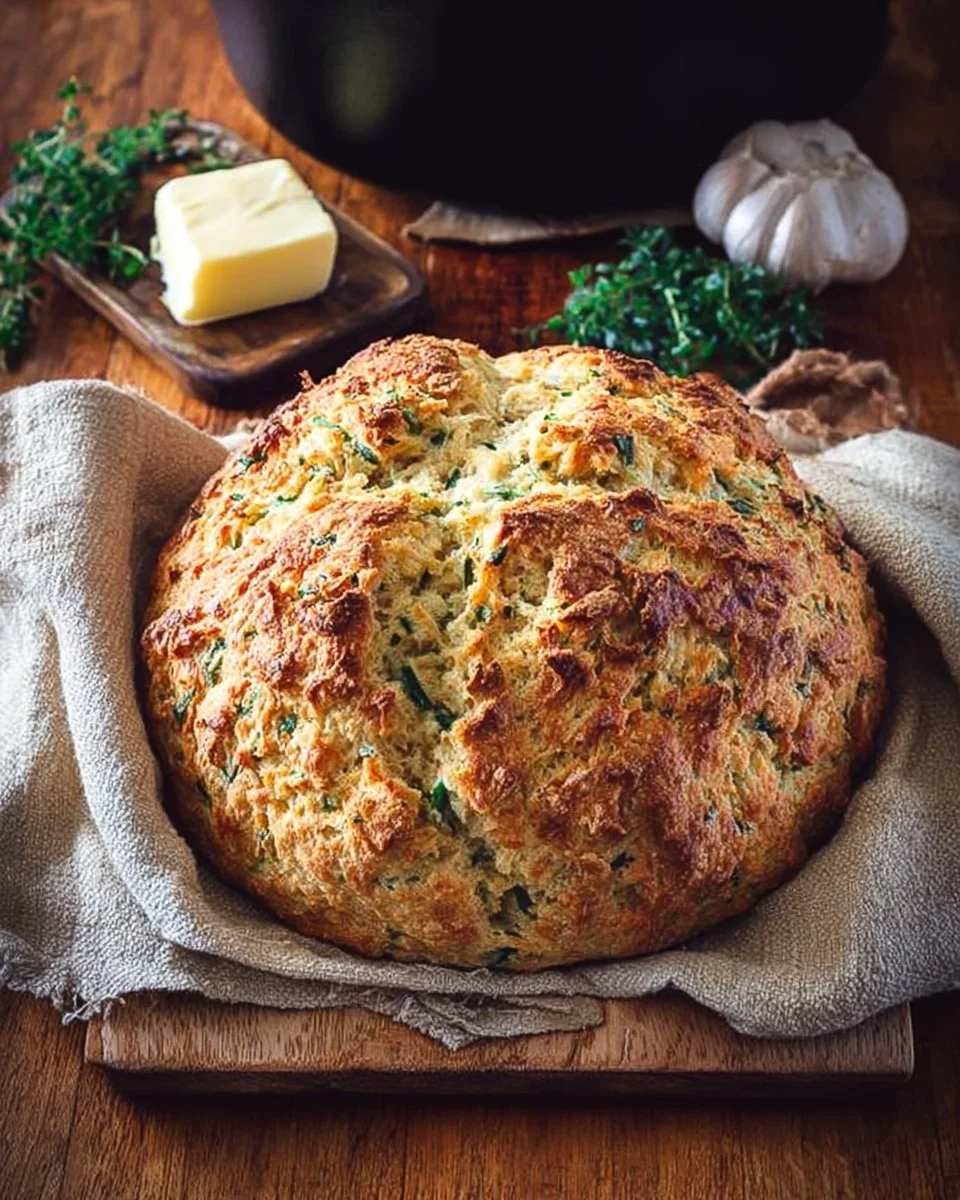
Easy Cheddar & Herb Irish Soda Bread is a simple loaf that bakes fast and tastes fresh. This bread uses baking soda and buttermilk instead of yeast, so you skip the long rise time and get a warm loaf in under an hour. It is a great choice when you want a homemade bread without a long wait. The cheddar adds protein and savory flavor, and the fresh parsley and herbs add color and nutrients.
This recipe can fit a healthy kitchen pattern when you make smart swaps. For a lighter option, use part whole wheat flour to add fiber and keep blood sugar steadier. For fast weeknight meals, it works well with soups and salads. If you like bold bread, you might also enjoy recipes like this cheesy garlic bread recipe for another simple bread side.
This article shows how to bake the loaf, how to make it a healthier version, and how to use it for meal prep. You will find tips for storage, serving, and easy variations so the bread fits many diets.
WHY YOU WILL LOVE THIS RECIPE
You will love this Easy Cheddar & Herb Irish Soda Bread because it is quick, tasty, and flexible. It is a lighter option compared with yeast breads that need time to rise. The mix-and-bake method makes it perfect when you need a fast, wholesome loaf. The recipe uses simple pantry ingredients and a small amount of sugar, so it is lower in added sugar than many store breads.
This bread can be a healthy version of a classic treat. By choosing lean pairings and whole grain flour, you can make it heart-healthy and higher in fiber. The cheddar brings extra protein, which helps make each slice more filling and helpful for steady energy. It is also great for meal prep since it keeps well and slices easily for sandwiches or sides.
If you want to keep calories in check, control your portions and use one to two thin slices per serving. That makes this bread good for weight loss plans when paired with lean proteins and vegetables. It works as an easy, balanced meal partner without extra fuss.
HOW TO MAKE Easy Cheddar & Herb Irish Soda Bread
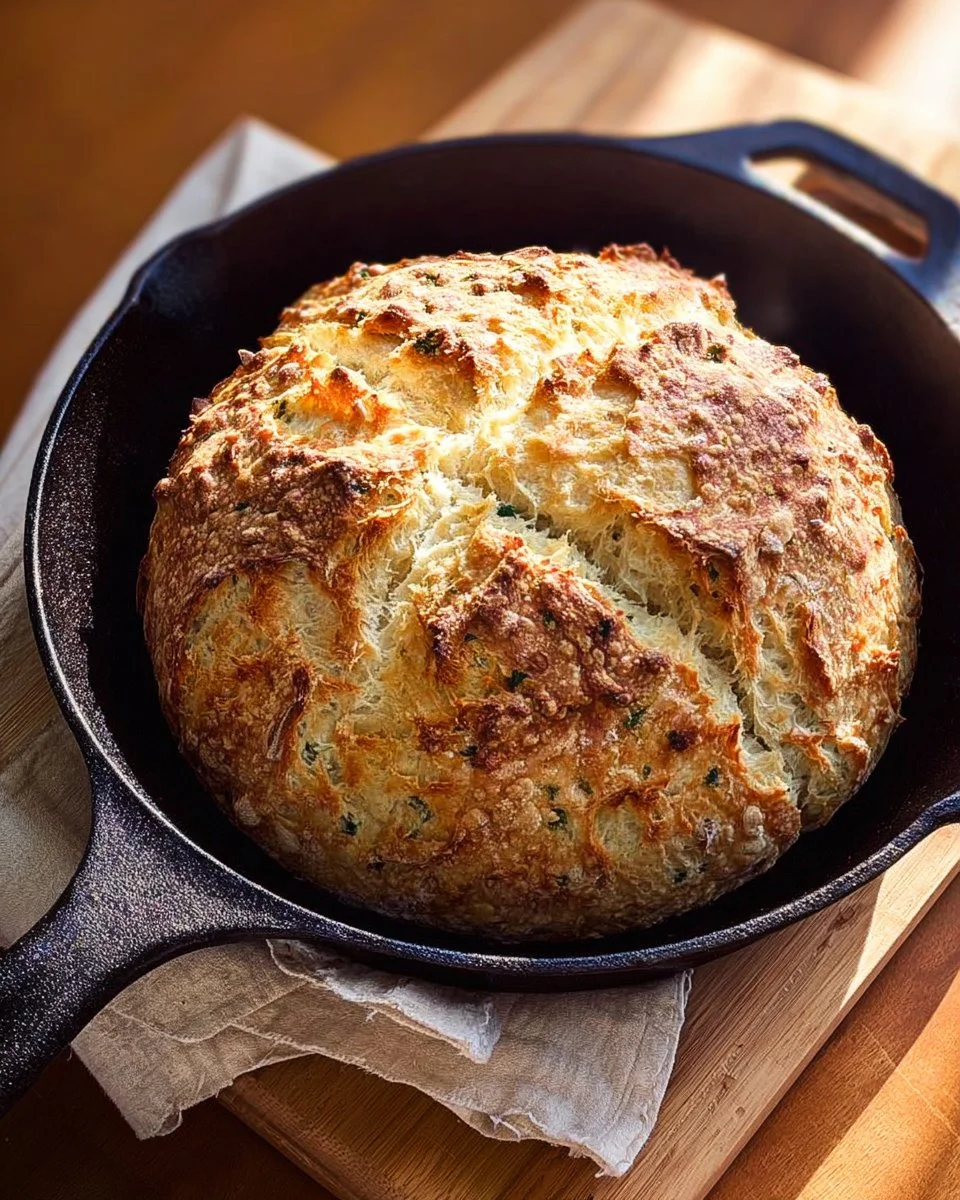
This soda bread is fast to make. The dough comes together in one bowl and bakes in a cast iron skillet for a crusty exterior. The steps are simple: whisk dry ingredients, fold in herbs and cheese, mix wet ingredients, form a ball, and bake. It gives a crusty, golden loaf with a soft, tender crumb inside.
You can adapt the base to make it higher in protein, lower in carbs, or gluten-free using specific swaps. Later sections give clear options for healthier versions and high-protein or air fryer variations.
EQUIPMENT NEEDED
- Large mixing bowl
- Whisk or fork
- Serrated knife
- Cast iron skillet (10-inch recommended) or baking sheet
- Parchment paper
- Measuring cups and spoons
- Cooling rack
- Mixing spatula or hands for kneading
Ingredients You’ll Need :
- 2-3/4 cups AP flour
- 1 tsp baking powder
- 1 tsp baking soda
- 1 tsp sugar
- 1/2 tsp salt
- 1/2 tsp pepper
- 1/4 cup fresh parsley
- 1/2 Tbsp dried chives
- 1/2 tsp dried dill
- 6 oz shredded white sharp cheddar cheese
- 1 cup buttermilk
- 1 egg
- 1/4 cup melted butter (or margarine) – slightly cooled
STEP-BY-STEP INSTRUCTIONS :
- Preheat oven to 425. Line a cast iron skillet with parchment paper.
- In a large mixing bowl whisk together the flour, baking powder, baking soda, sugar, salt, and pepper.
- Mix in the parsley, chives, dill and cheese with a fork until it’s well combined and nothing is clumped together.
- In a separate bowl whisk together the buttermilk, egg and cooled 1/4 cup melted butter.
- Make a well in your dry ingredients and pour the wet ingredients in the center.
- Use your fork to mix until the ingredients start to combine, (dough will be shaggy). Then use your hands or a spatula to finish mixing and bring it together in to a ball. (If your dough seems too wet to form in to a ball, just sprinkle with a little extra flour and pull together.)
- Empty the dough on to the middle of the skillet lined with parchment paper and gently re-form in to a ball – don’t push out to the sides – it will rise and spread in the oven.
- Make an “X” in the top of the dough with a serrated knife.
- Bake at 425 for 28-33 minutes, or until it’s golden brown and cooked through. (If it starts to get too brown, just place a piece of foil over the top for the rest of the cooking time, but I love a crusty loaf.)
- Remove the loaf from the cast iron skillet using the parchment paper and place it on a cooling rack. (Optional: Immediately brush with a little melted butter.) Let cool for at least 15 minutes before slicing and serving.
- Serve with butter!
HOW TO SERVE Easy Cheddar & Herb Irish Soda Bread
Serve this bread warm with savory mains or as a snack. For a healthy serving, choose one thin slice with a soup or salad. Pairing ideas that keep meals balanced:
- One slice with a cup of vegetable soup and a side salad for a light meal.
- Make a sandwich with lean turkey, spinach, and mustard. One to two slices make a high protein meal when you add lean meat or Greek yogurt spread.
- Toast a slice and top with cottage cheese and sliced tomato for a protein-forward snack.
Portion control tip: Aim for 1 slice (about 1.5–2 inches thick) per person with a protein and a vegetable to keep calories low. This is great for meal prep because you can slice the loaf ahead and portion it for the week.
STORAGE & FREEZING : Easy Cheddar & Herb Irish Soda Bread
Keep the bread at room temperature up to two days in a bread box or wrapped in a clean towel. For longer storage, wrap the cooled loaf tightly in plastic wrap and aluminum foil and freeze up to 3 months. Slice before freezing to make it easy to thaw only what you need.
To thaw, remove slices from the freezer and let sit at room temperature for 20–30 minutes or toast directly from frozen. Reheat slices in a 350°F oven for 8–12 minutes to restore a crispy crust. This loaf freezes well, so it is a real time-saver for busy cooks.
SERVING SUGGESTIONS
This bread works with a range of healthy side options. Try these balanced pairings:
- Green salad with lemon vinaigrette and grilled chicken for a complete meal.
- Steamed vegetables and a small portion of salmon for a heart-healthy plate.
- Hummus and raw veggie sticks for a fiber-rich snack.
At holiday time, serve slices with a light dessert like shortbread or fruit. For a seasonal touch, a small sweet bite works well after a savory plate — for example, try a classic shortbread cookies recipe if you want a simple sweet treat after soup and bread.
VARIATIONS
- Healthier version: Replace half the all-purpose flour with whole wheat flour for added fiber. Use low-fat cheddar or reduce cheese to cut calories. Use olive oil instead of butter for a heart-healthy fat. This makes a healthier version that still tastes good.
- High-protein or low-carb version: For a high protein meal, add 1/2 cup of plain Greek yogurt to the wet ingredients and use 1/4 cup extra egg (one more egg) to raise protein. For low-carb, make a version with almond flour and a blend of coconut flour with added eggs and baking powder, or use a high-protein flour blend. A version with added whey protein powder can boost protein per slice. These swaps create a denser, high-protein loaf that works well as a sandwich base.
- Air fryer or oven-baked version: If you have a small air fryer large enough for a small round loaf, reduce baking time to 18–22 minutes at 375°F and check for a golden top. For oven baking on a sheet, bake at 425°F for the same time but rotate the pan halfway for even browning. This makes it easy to adapt if you prefer an air fryer method.
For a fun meal twist, serve as a bread bowl with creamy pasta or stew, inspired by ideas like chicken alfredo garlic bread bowls, but keep portions small for a balanced meal.
FAQs
Q: Is this bread low in sugar and good for people watching sugar intake?
A: Yes. The recipe uses only 1 tsp sugar, so it is low in added sugar. With whole wheat swaps, it can be a low-sugar option that fits a low-sugar plan.
Q: Can I make this bread diabetic-friendly?
A: You can make it more diabetic-friendly by using whole wheat or mixed grain flour, reducing portion size, and pairing slices with protein and vegetables to slow blood sugar rise. Use low-fat cheese and control portion size for better blood sugar balance.
Q: How long will the bread keep in the fridge?
A: Store in the fridge up to 5 days wrapped tightly, though room temperature storage for 1–2 days is fine. For longer life, freeze slices and thaw as needed.
Q: Is this bread a good choice for weight loss?
A: This bread can be part of a weight loss plan if you watch portions and pair it with protein and vegetables. Use it as a lighter option by choosing one slice with lean protein and a salad to keep calories lower and satisfaction higher.
Q: Can I use regular milk instead of buttermilk?
A: You can make a quick buttermilk substitute by adding 1 tablespoon lemon juice or vinegar to a cup of milk and let sit 5 minutes. This helps the soda react and gives the proper rise.
Q: Can I add other cheeses or herbs?
A: Yes. Try sharp cheddar, smoked gouda, or a mix. Fresh rosemary or thyme also work well. Adjust salt to taste when changing cheese.
MAKE-AHEAD TIPS FOR Easy Cheddar & Herb Irish Soda Bread
This bread is great for meal prep. Bake the loaf on a weekend and slice it for breakfasts and lunches. Store slices in the freezer for quick toast or sandwiches. You can also divide dough into small rounds and freeze raw dough balls on a sheet tray; then bake from frozen adding a few extra minutes.
To save time, shred the cheese and chop herbs ahead and store them in the fridge. Mix dry ingredients in a sealed jar so you only add wet ingredients when ready to bake. These steps make this loaf a real time-saver and a practical choice when you need a homemade bread fast.

Easy Cheddar & Herb Irish Soda Bread
Ingredients
Method
- Preheat oven to 425°F and line a cast iron skillet with parchment paper.
- In a large mixing bowl, whisk together the flour, baking powder, baking soda, sugar, salt, and pepper.
- Mix in the parsley, chives, dill, and cheese with a fork until well combined.
- In a separate bowl, whisk together the buttermilk, egg, and cooled melted butter.
- Make a well in your dry ingredients and pour the wet ingredients into the center.
- Mix until the ingredients start to combine. Use your hands or a spatula to finish mixing and bring it into a ball.
- If the dough seems too wet to form into a ball, sprinkle with a little extra flour and pull together.
- Empty the dough onto the middle of the skillet lined with parchment paper and gently re-form it into a ball.
- Make an 'X' in the top of the dough with a serrated knife.
- Bake at 425°F for 28-33 minutes or until golden brown and cooked through. Optionally, cover with foil if it starts to get too brown.
- Remove the loaf from the skillet using the parchment paper and place it on a cooling rack.
- Optionally, brush with melted butter immediately and let cool for at least 15 minutes before slicing.