
INTRODUCTION
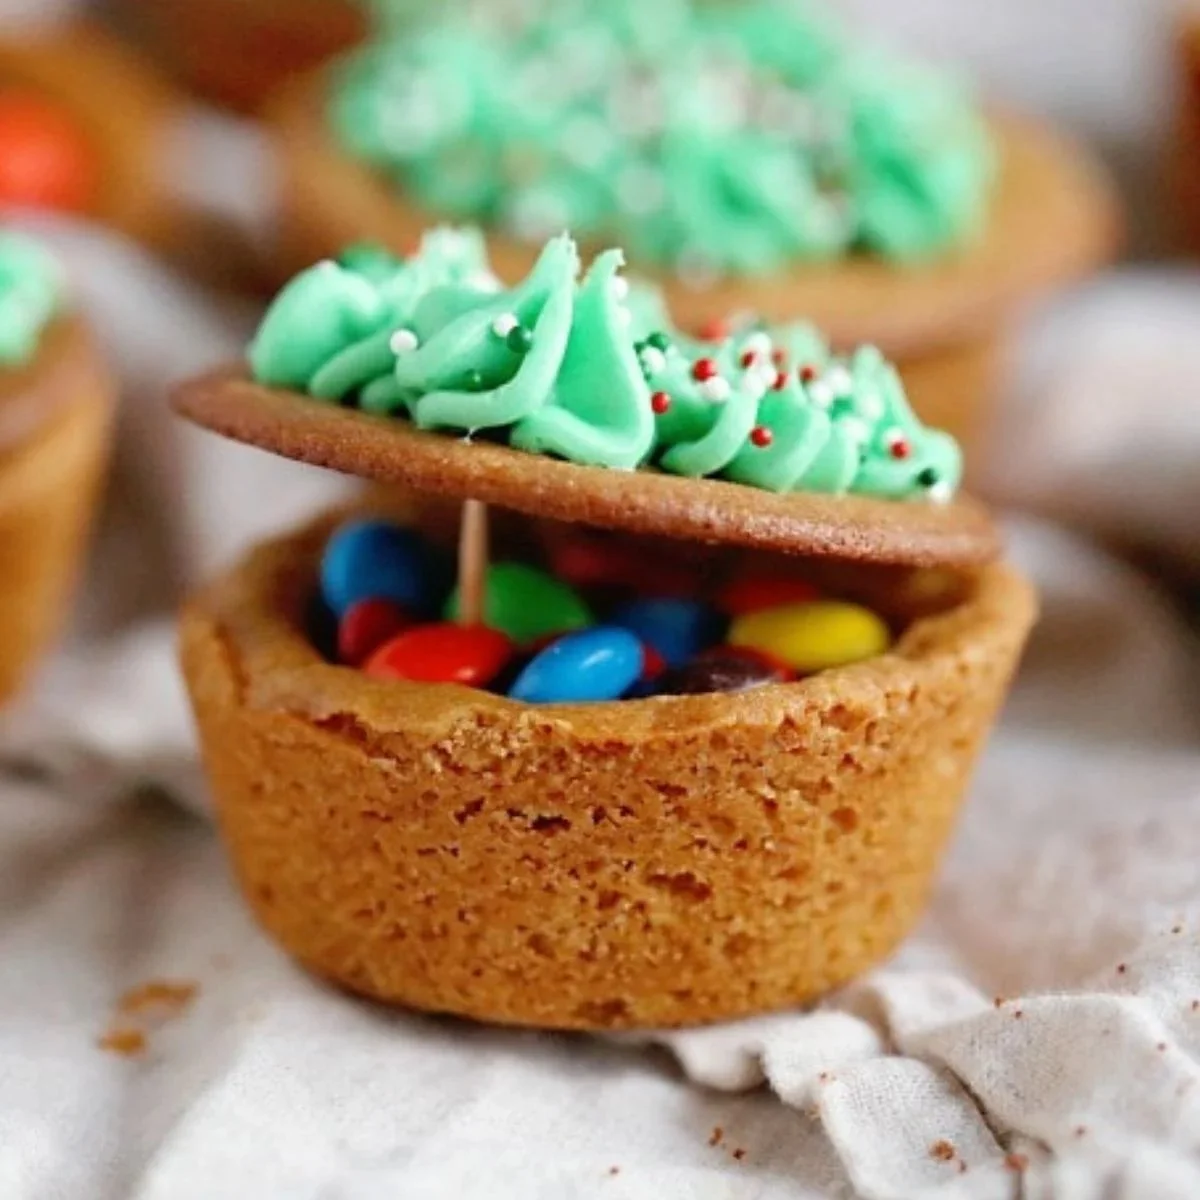
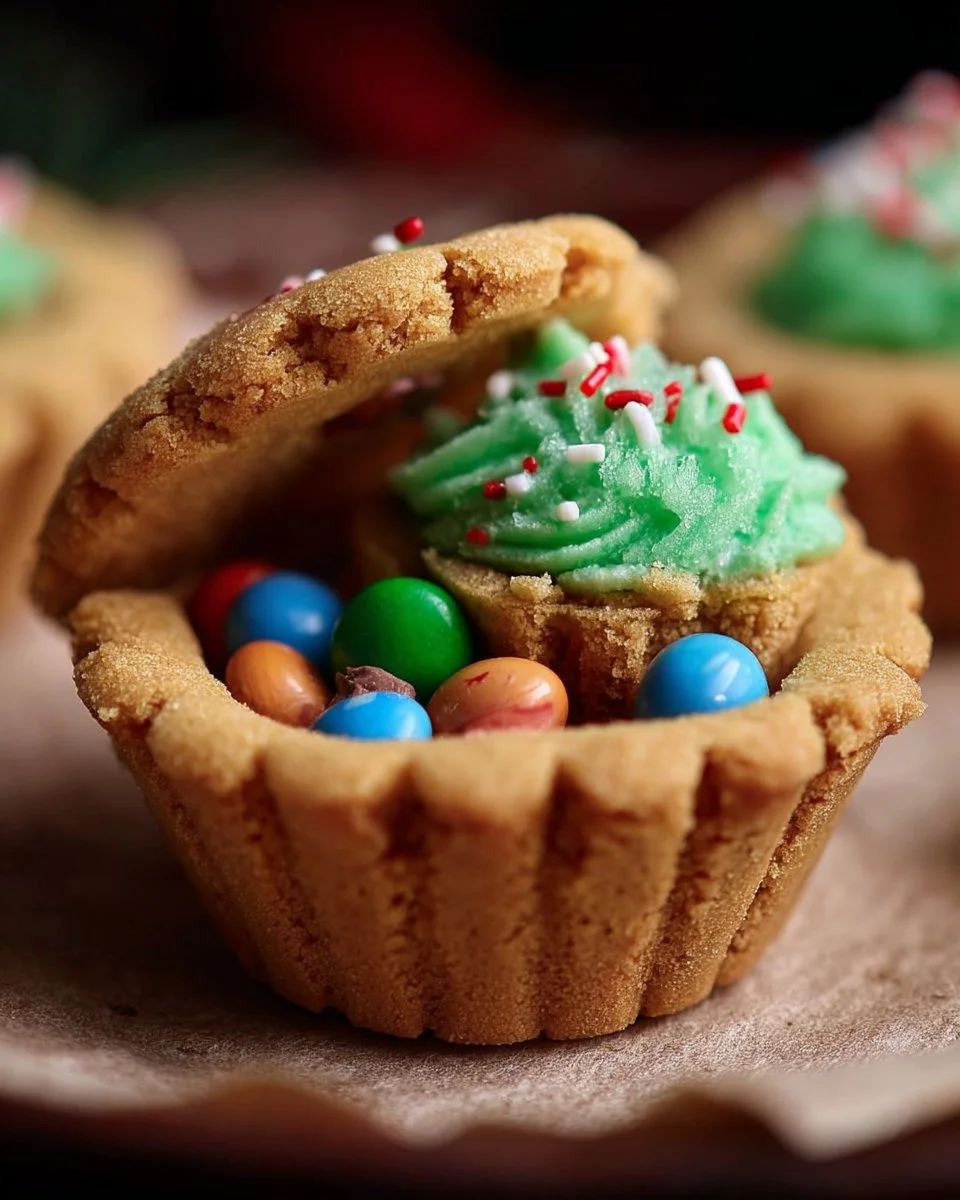
Holiday Surprise Basket Cookies are fun treats for the season. They look like small baskets and hide a sweet surprise inside. Kids and adults both will love how they snap and how the filling pops out. You can make them plain or fill them with candy, nuts, or dried fruit. The dough is simple and holds shape well when baked in a muffin pan. These cookies are a good choice if you want a pretty plate of cookies that feel special.
If you like playful cookie ideas, try recipes like marshmallow surprise hot cocoa cookies to find more fun flavor ideas. This cookie makes a great gift or a dessert for a party. You can change the filling to match the holiday, theme, or what you have on hand. The steps are easy and the result looks bright and happy.
WHY YOU WILL LOVE THIS RECIPE
You will love these Holiday Surprise Basket Cookies because they are fun to make and easy to share. The dough is forgiving, so even a beginner can shape the baskets. The cookie cups hold many fillings, giving you a way to use candy or nuts you already have. You can make them a day ahead, decorate them with bright icing or sprinkles, and serve them warm or room temperature.
If you enjoy soft, bakery-style textures, try comparing this method with a classic bakery-style chocolate chip cookies recipe to see how different techniques change the final bite. You will also like how these cookies let you be creative. Make them kid-friendly by filling them with candy, or keep them grown-up with toasted nuts and dried fruit.
HOW TO MAKE Holiday Surprise Basket Cookies
This section walks you through the main idea. You will make a dough, form it into thin-lined muffin cups, bake to hold the shape, and then top with flat cookie lids. Fill each basket with candy or your chosen surprise. Keep the dough cool if you want sharper edges. The recipe below gives a simple and clear method to follow.
For tips on cookie dough texture and handling, you can read about techniques used in the best homemade chocolate chip cookies guides. These tips help you know when the dough is right to press and bake.
EQUIPMENT NEEDED
- Large mixing bowl
- Handheld mixer or stand mixer
- Measuring cups and spoons
- Rubber spatula
- Muffin pan that holds 12 muffins
- Rolling pin
- Glass or cup to cut round cookie lids
- Rimmed baking sheet
- Cooling rack
- Nonstick cooking spray or shortening
Ingredients You’ll Need :
2 1/2 cups all-purpose flour, 1 cup sugar, 1 cup brown sugar, packed, 1 teaspoon baking soda, 2 teaspoon baking powder, 3/4 teaspoon salt, 1 tablespoon vanilla, 2 large eggs, 1/2 cup unsalted butter, room temperature, cup candy, nuts or dried fruit – or more if desired, 1/3 cup cocoa powder (optional), your favorite candies, sprinkles, icing tubes
STEP-BY-STEP INSTRUCTIONS :
In a large bowl, ideally with a handheld or stand mixer, cream together the butter and sugars on medium speed until combined.
Blend in the eggs and vanilla. Scrape down the sides of the bowl as needed.
Next with the mixer on low speed, add the flour, baking soda and baking powder until combined. The cookie batter will become very thick.
You can either bake immediately or cover and refrigerate at least an hour, up to overnight. I prefer baking with chilled dough but it is not necessary with this dough.
Preheat your oven to 350 degrees.
Split your dough into 3 equal pieces, approximately.
Next combine 2 of the pieces into one. Now you have a large piece and a small piece.
Prepare a regular sized muffin pan (holds 12 muffins) with cooking spray.
Using the larger piece of dough press each cookie basket into each cup so it lines the bottom and sides of the tin. You have to press the dough as thin as possible into the sides and bottom of each muffin cup.
Bake for 13-16 minutes or until golden brown and the bottom of the cup looks somewhat cooked. The dough will fall slightly to the center of each muffin while baking. This is ok.
Remove from oven and cool in the muffin tin for at least 5 minutes.
Once cups are cool fill them with anything you want!
Prepare a rimmed baking sheet with cooking spray and set aside.
Grab your remaining small piece of dough. Using a rolling pin lightly flour your work surface and roll the dough out flat, about 1/4 of an inch thick.
Using a glass or a cup that is about the same size as the opening as your muffin tin, press into your dough and make as many round cookies as needed to cover or become the top of each of your cookie baskets.
Bake for 8-10 minutes.
Allow to cool and then decorate the tops with icing and/or sprinkles as well. Decorate and then place a flat cookie on top of each basket.
Serve and enjoy!
HOW TO SERVE Holiday Surprise Basket Cookies
Serve these cookies on a large plate or a tiered tray to show off the baskets. Place one cookie basket per person or arrange them in a circle to make a pretty display. For parties, put a small sign that tells what is inside each basket so guests can choose. Warm baskets slightly in a low oven for a few minutes if you want the filling to feel soft. If you want to give them as gifts, wrap each cookie in clear cellophane and tie a ribbon.
Try pairing with drinks like hot cocoa, milk, or tea. If you want a full dessert table, add a few other small sweets so guests can mix flavors. For a different flavor fit, look at ideas such as blueberry cheesecake cookies for how to pair fresh and creamy items on your dessert spread.
STORAGE & FREEZING : Holiday Surprise Basket Cookies
Store the cookie baskets in an airtight container at room temperature for 2 to 3 days. If you fill them, use fillings that do not spoil quickly, like wrapped candy or dry nuts. If you fill with chocolate pieces, store in a cool place so the chocolate does not melt.
To freeze, store unfilled cookie cups in a single layer on a baking sheet and freeze until firm. Then move them to a freezer bag or airtight container. Freeze up to 2 months. Thaw at room temperature before filling. If you freeze the finished baskets with filling, use dry fillings only and expect a change in texture after thawing. Do not freeze filled baskets that contain fresh fruit or whipped fillings.
SERVING SUGGESTIONS
- Make a themed set: use red and green icing for Christmas or blue and white for winter.
- Add a small note or tag to each cookie for party gifts.
- Serve with a small scoop of ice cream on the side for a dessert plate.
- Place several baskets in a gift box with tissue paper for a simple edible gift.
- For a brunch, pair these cookies with coffee and fruit. For a lively mix, include candies that match the look of the basket.
VARIATIONS
- Chocolate Basket: Add 1/3 cup cocoa powder to the dry mix to make chocolate dough.
- Nutty Basket: Fill the baskets with chopped toasted nuts and a drizzle of caramel.
- Fruit Basket: Add dried cherries or cranberries to the filling for a tart note.
- Candy-Filled: Use mini chocolate candies, peppermint bits, or gumdrops for color.
- Spiced Basket: Add 1 teaspoon cinnamon and 1/4 teaspoon nutmeg to the dough for warm flavor. For a seasonal twist, try decorating with crushed peppermint like in candy cane cookies ideas.
FAQs
Q: Can I make the dough without a mixer?
A: Yes. You can use a strong wooden spoon or a spatula. You might need more time to cream the butter and sugar well. Make sure the butter is soft enough to mix by hand.
Q: Can I make smaller baskets?
A: Yes. Use a mini muffin pan and reduce baking time. Check often and remove when the cups look set and lightly golden.
Q: Can I change the filling?
A: Yes. Use any small candy, nut, or dried fruit. You can also add a small chocolate or a sugared fruit drop. Avoid wet fillings that will make the cup soggy.
Q: How long will filled cookies stay fresh?
A: For best quality, eat filled cookies within 2 days at room temperature if the filling is dry. If you use chocolate, store in a cool place to prevent melting.
Q: Can I make the lids ahead?
A: Yes. You can bake the lids and store them in an airtight container. Add icing just before placing them on the baskets.
Q: Why did my basket fall more than expected?
A: If the dough was too soft or pressed too thin, it can sink. Chilling helps keep the shape. Also do not overfill the cups before baking as that can weigh them down.
MAKE-AHEAD TIPS FOR Holiday Surprise Basket Cookies
- Make the dough and chill it up to 24 hours. Chilled dough is easier to press thin and hold shape.
- Bake the cup shells and lids a day ahead. Wrap the cooled pieces in a single layer of parchment and store in an airtight container.
- Keep icing and sprinkles separate until you decorate. This keeps colors fresh and prevents sugar smudges.
- Fill and assemble the baskets the day of the event for the best look. If you must assemble early, use dry fillings and store in a cool, dry place.
- If you plan to freeze, freeze unfilled shells and lids. Thaw and fill when you are ready to serve.

Holiday Surprise Basket Cookies
Ingredients
Method
- In a large bowl, cream together the butter and sugars on medium speed until combined.
- Blend in the eggs and vanilla. Scrape down the sides of the bowl as needed.
- With the mixer on low speed, add the flour, baking soda, and baking powder until combined. The cookie batter will become very thick.
- You can either bake immediately or cover and refrigerate for at least an hour, up to overnight.
- Preheat your oven to 350 degrees.
- Split your dough into 3 equal pieces. Combine 2 of the pieces into one large piece and keep 1 small piece aside.
- Prepare a regular-sized muffin pan (holds 12 muffins) with cooking spray.
- Using the larger piece of dough, press each cookie basket into each muffin cup, lining the bottom and sides as thin as possible.
- Bake for 13-16 minutes or until golden brown.
- Remove from oven and cool in the muffin tin for at least 5 minutes.
- Using a rolling pin, roll out the remaining small piece of dough to about 1/4 of an inch thick.
- Using a glass or cup, cut round cookie lids that match the size of the muffin tin tops.
- Bake for 8-10 minutes, then allow to cool.
- Once the cups are cool, fill them with your chosen fillings.
- Decorate the tops with icing and/or sprinkles before placing a flat cookie lid on top of each basket.
- Serve and enjoy!